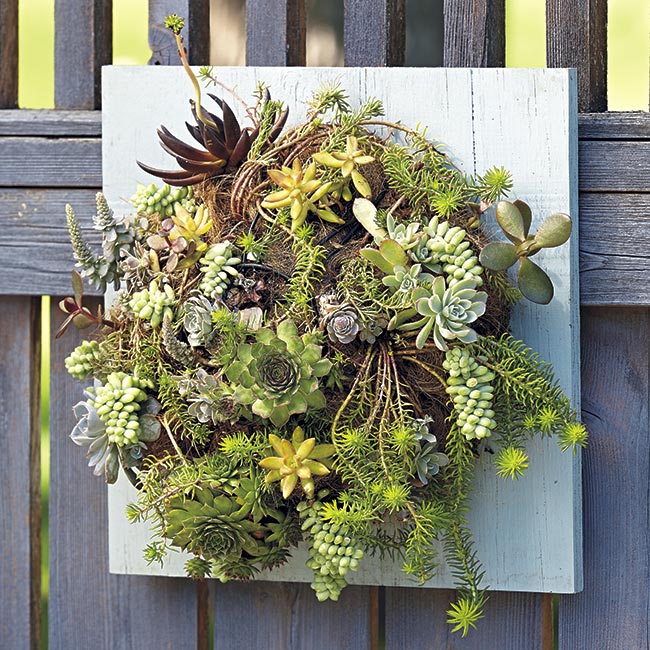
This succulent wall planter is a living piece of art!
A privacy fence makes sitting in your backyard a little more relaxing — you have the space all to yourself. The downside is, who wants to sit around looking at a blank wall while they’re kicking back on the patio? Adding an outdoor ornament is nice but you can crank the décor up a notch by making this unique living wall planter made from a board, an inverted hanging basket and plants.
Succulents are the common-sense choice for this project. They don’t need a lot of water and actually grow best with the good drainage a coco fiber-lined basket provides. In addition, the variety of leaf shapes and colors you can find is amazing and most grow slowly so they’ll hold those interesting shapes for much of the growing season.
Though it may look like some gravity-defying trick, this project isn’t as hard to make as you might think. In fact it’s so easy you could even make several to hang all along a length fence! Keep scrolling to find out how.
You Might Also Like:
Helpful Gardening Videos
Best Places to Buy Plants Online
A Convenient Container Garden
Patio Design Ideas
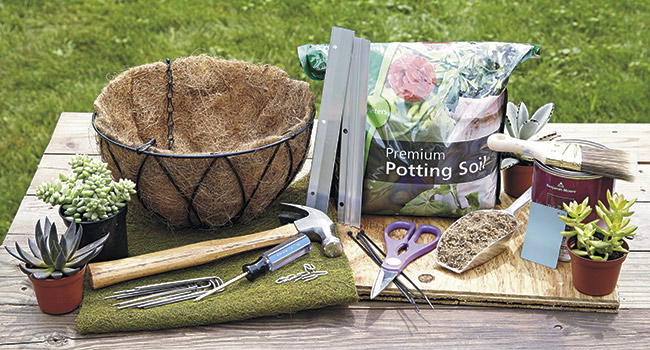
What you'll need to create your succulent wall planter
Materials & Tools
- 12-in. metal hanging basket with coco liner
- Z-bar bracket
- Succulent potting mix
- Sand
- Outdoor paint, paint brush
- Hammer, screwdriver, steel staples, cable ties, scissors, landscape staples
- 18 × 24-in. sheet of coco liner
- 16 × 16-in. piece of treated plywood
- Assorted succulents and sedums
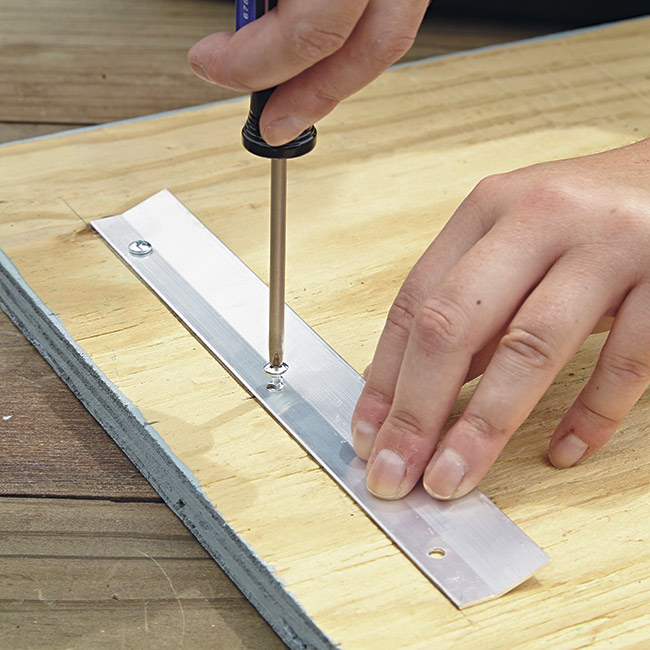
Step 1: Build the frame
Start by painting a 16-in. square piece of treated plywood with the outdoor paint of your choice. When it’s dry, turn it over and attach one of the Z-bar brackets (found online or at your local hardware store) you see in the photo above to the back. The other one goes on the wall where the basket will hang. This bracket is strong enough to support the weight of the basket and hold the board flush against the privacy fence.
Step 2: Prepare potting mix
Combine 2 parts soilless potting mix to one part coarse sand to give sedums and other succulents the sharp drainage they need to grow their best. Premoisten the potting mix, so it’s damp but not soupy.
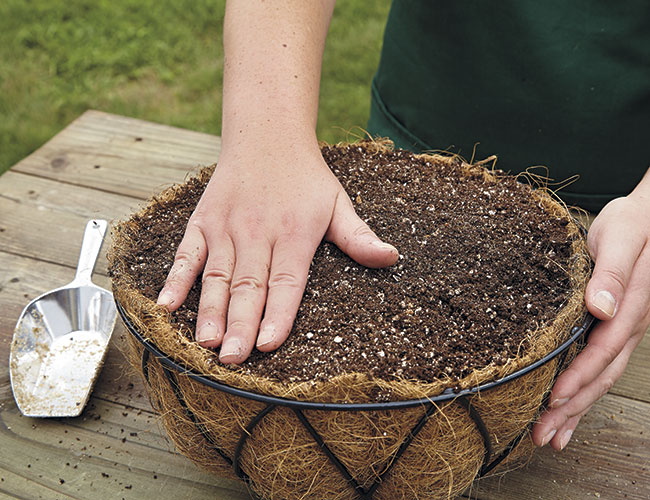
Step 3: Prepare the basket
Remove the hanging basket’s chain. Add the prepared potting mix to the basket and press it in firmly with your hand, as the photo above shows. You want to get as much potting mix into the basket as possible so it won’t settle, leaving gaps when you turn it over and start planting. If there’s space between the mix and the edge of the basket, add more.

Step 4: Line the back of the basket
Cut a circle from the sheet of coco liner that’s a little larger than the size of the hanging basket opening, as you see above. It doesn't matter what color the circle of coco liner is since it will be pressed up to the plywood backing and won't be seen later.
You Might Also Like:
How to Root Succulents with Leaf Cuttings
Drought-Tolerant Sedum Combo
Best Hanging Basket Plants
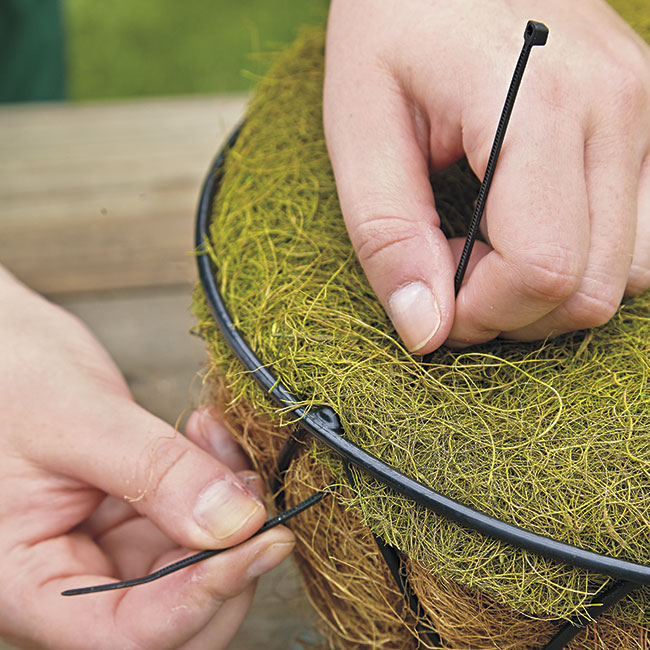
Step 5: Fasten the liner to the basket
Use cable ties to fasten the liner the basket’s lip, making sure to go through both layers of the liner to hold it all in place. You may need to tuck the edges in a bit. Space the cable ties a couple of inches apart around the basket. This will keep all that potting mix from spilling out of the basket.
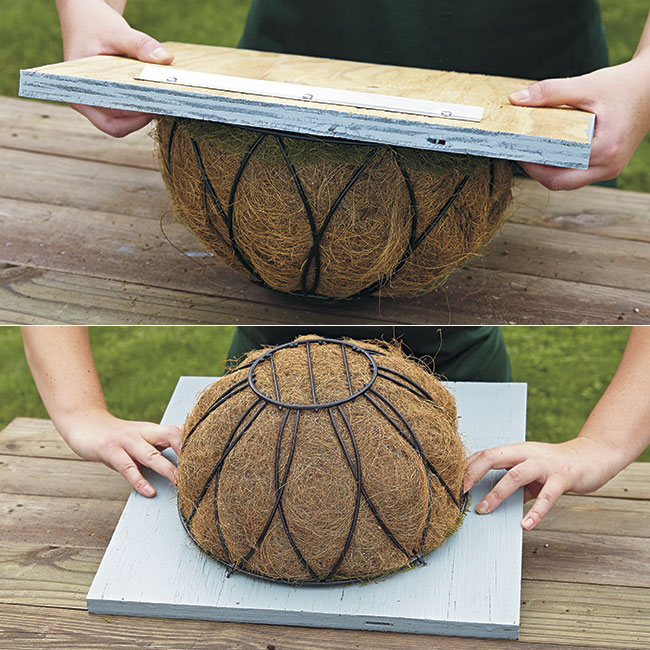
Flip the basket
Now position the painted board on the mouth of the basket, grab hold tightly with both hands and flip it over so that it is laying flat. Then it is time to fasten the basket to the board so you can get to the fun part of the project, designing and planting with succulents!
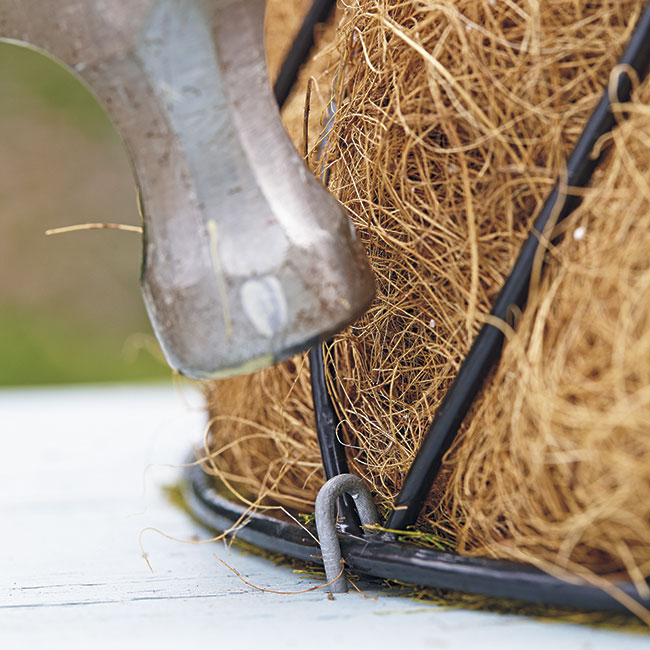
Step 6: Fasten the basket to the board
Use heavy-duty 9-gauge galvanized steel staples and pound them in with a hammer every 2 to 3 in. around the edge to keep the basket securely fastened to the board.
Step 7: Plant the basket
Now for the fun part — planting your succulents and sedums! Most of your plants will probably come from the garden center or try online sources such as Succulent Gardens. But you can also dig or cut a few pieces of ground cover sedums (Sedum spp. and hybrids) or hen and chicks (Sempervivum spp. and hybrids) from your garden to help fill in the gaps. These plants are good fillers since they grow quickly.
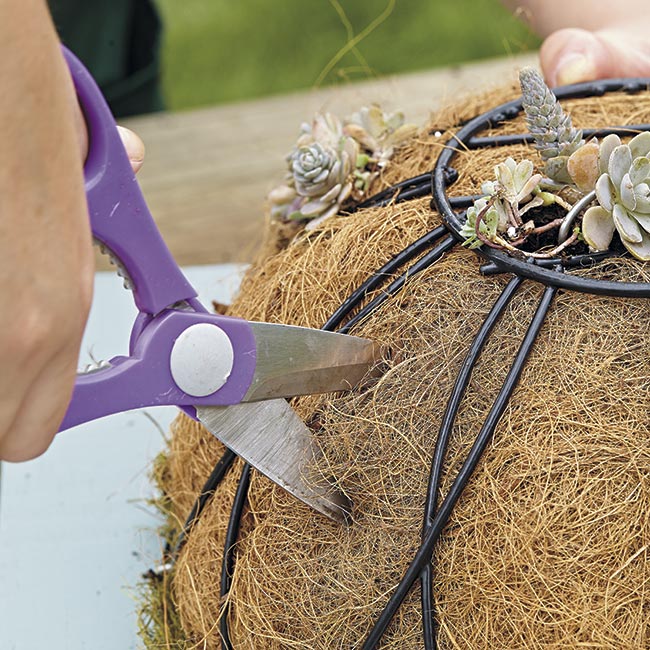
Cut a planting hole
Coco liners are so dense that you can’t just pull them apart with your fingers — use scissors or a garden shears to make a hole instead. That makes it easier to pull back the sides and create a planting space.
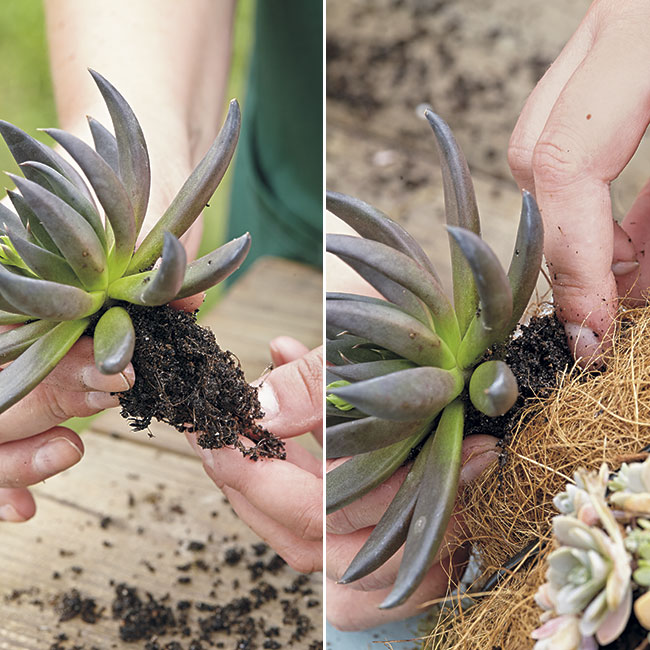
Plant in the prepared hole
Once you have a spot in the liner ready, tip the plant gently out of its nursery pot. If the root ball stays intact, you may need to gently squeeze the root ball or shake some of the soil off to get it in the planting hole.
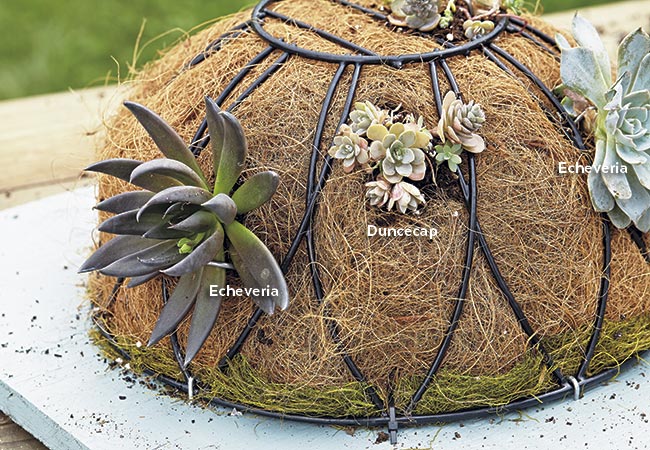
Use a variety of leaf shapes and colors for a good-looking basket. Some succulents, like echeveria (Echeveria hybrid) keep their rosette form all season. Others, like duncecap (Orostachys boehmeri), have a spreading habit.
Step 8: Add extra support
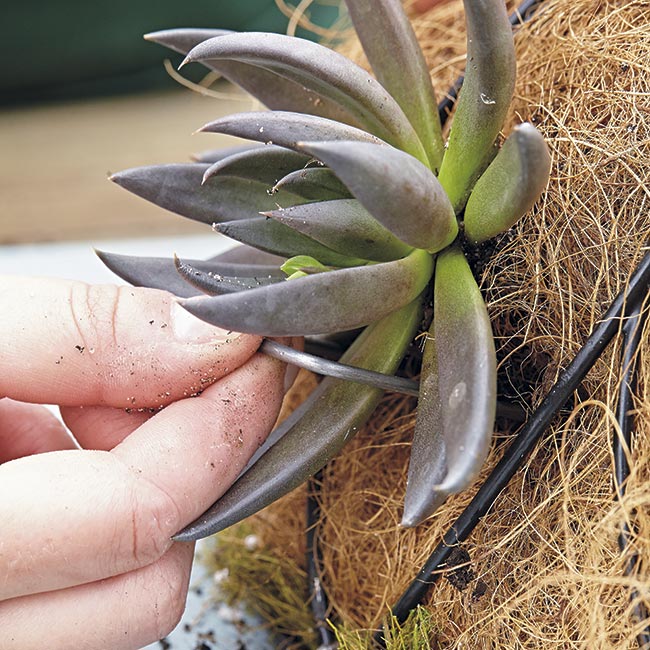
Since this basket will be hanging on a wall, some of the plants might need help initially to stay in place. Keep top-heavy succulents secure by gently pushing a landscape staple over a leaf or two.
Handle succulents with care
Be careful when you’re handling succulents. It’s easy to break a stem or leaf off. You can root the broken piece and the parent plant will grow just fine. But it will affect the shape of the plant since the missing piece usually won’t grow back or the stem will branch from the broken point.
Add succulent leaf cuttings
You can also take some leaf cuttings from a jade plant (Crassula ovata) — they root pretty easily. Just snap a leaf from the parent plant. Let it dry in the shade for a few days to form a callous. Then stick the leaf into the liner so it makes contact with the potting mix.
Step 9: Water in your succulent wall planter & let settle
After you've watered the planting thoroughly, give the plants a week or so laying flat in a sheltered spot, out of direct sun to get settled in and start growing roots, before hanging it up.
Step 10: Hang your succulent wall planter
Where you place your living wall art makes a difference—too much sun can scorch the foliage of some succulents while not enough will change the color of others or cause them to stretch. Choose a place that gets morning sun or bright dappled shade and most will do fine.
How to care for your succulent wall planter
You shouldn’t have to water your succulents more than once a week, even in the heat of summer. They’re drought-tolerant and will rot with too much water. You may need to take the planter off the wall to get an even application with the hose. Or use a watering wand that has a gentle shower setting. If you expect several days of rain, move your living art to a sheltered spot so it doesn't become water-logged.
It is possible to overwinter this planting in cold climates. However, most succulents stretch and get gangly even under grow lights so your best bet is to disassemble it in fall and start fresh again the following spring.
You Might Also Like:
A Succulent and Cactus Watering Tip
How to Plant a Hanging Basket
Colorful Windowbox Plantings