What is a "Kokedama"?
Kokedama, translated “moss ball,” is a Japanese form of garden art. Simple yet elegant, it’s made by wrapping a plant’s roots with soil, sphagnum sheet moss and string, rather than planting in the ground or a container. This creates a striking focal point, drawing attention to the shape of flowers and foliage, especially in contrast to the smooth, round moss-covered ball.
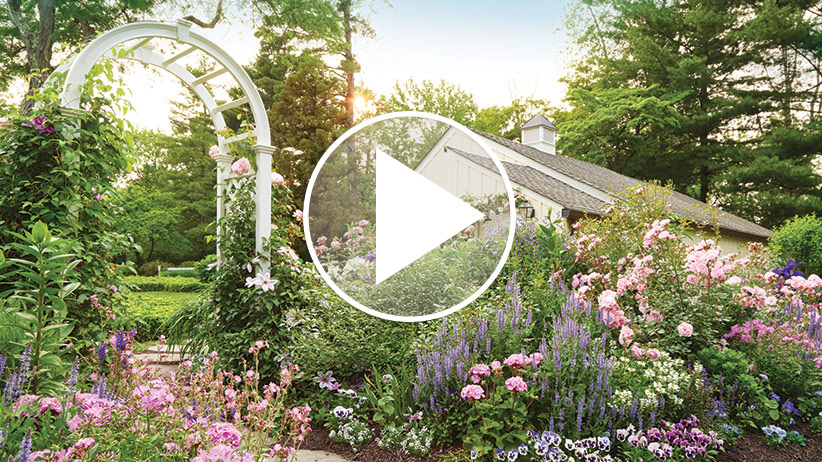
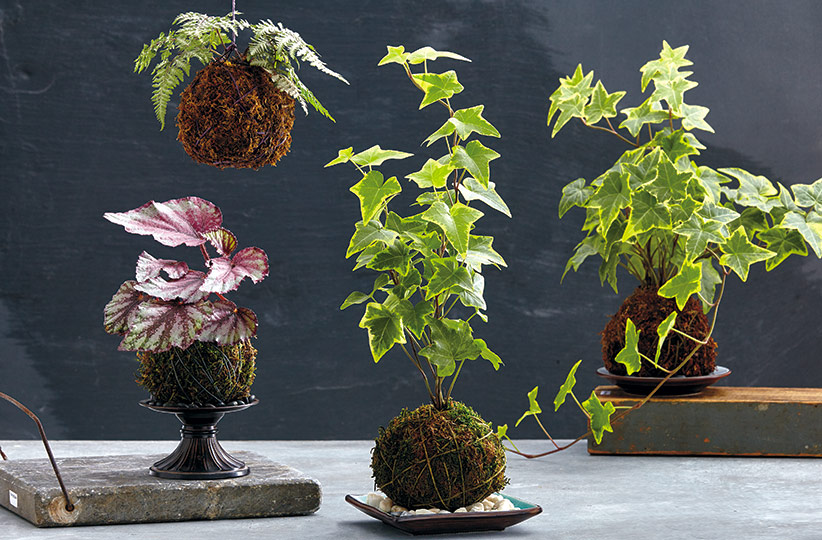
Enliven your home or garden with kokedama planters by setting them on trays, small stands or by hanging them from rafters or ceilings. It’s especially rewarding to surround yourself with kokedama planters you’ve made yourself—it’s not difficult to do! We’ll show you how. Start by watching the video above for a quick overview of how to make a kokedama, then scroll on for the details.
You Might Also Like:
How To Make a DIY Privacy Screen For Your Yard
How To Create a Spiral Topiary
DIY Bird Feeder Wreath
Flower & Plant Guide
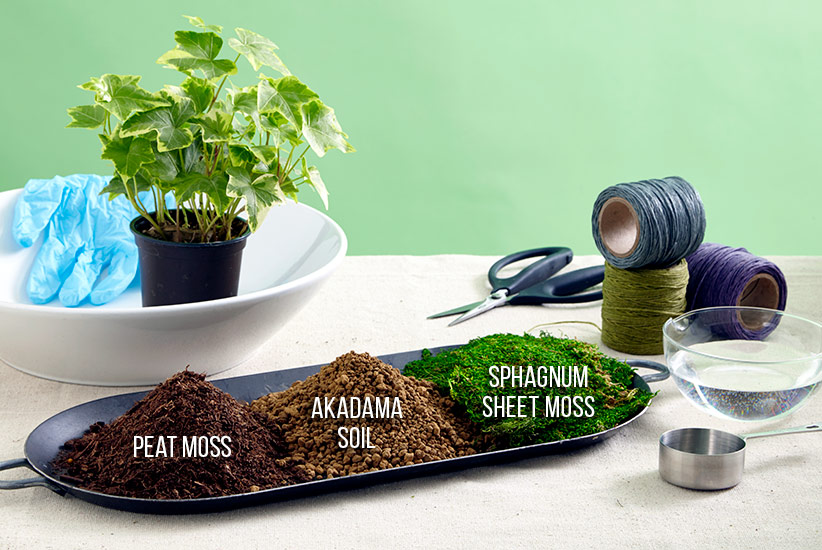
Most of the the tools and materials you need for this project are available at your local garden center and craft store. Gather up the items in the lists below, and then follow our helpful how-to steps.
Kokedama materials list
- Peat moss
- Akadama soil
- Sphagnum sheet moss
- Waxed string or floral wire
- Plants proportionate to the size of ball you’re creating
Helpful tools
- Scissors
- Bowl
- Latex gloves
- Measuring cup
How to make a Kokedama
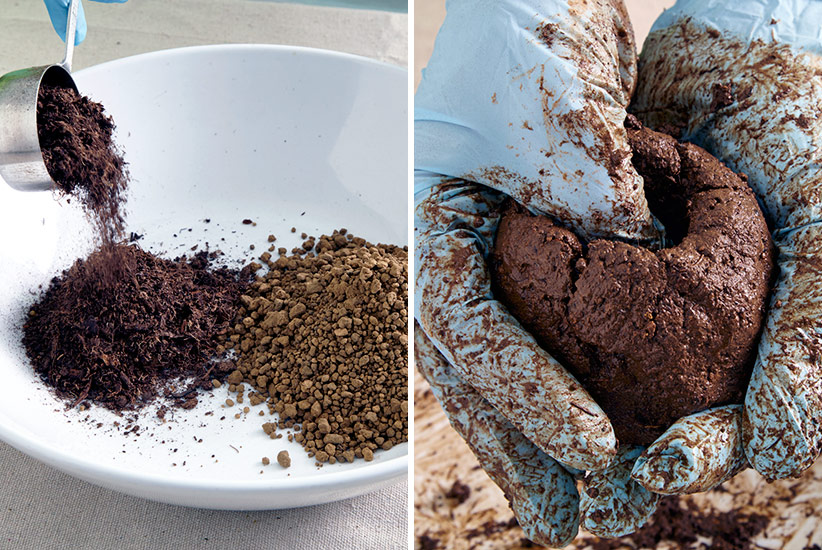
Step 1: Prepare the soil ball
Akadama soil, also used in potting mix for bonsai trees, is a type of granular volcanic clay soil from Japan. Combining it with peat moss in a 1:1 mix helps keep the ball moist so you won’t need to water it as often.
- For an average-sized ball 4 inches in diameter, add 1 cup of each potting medium, as you see in the photo above, to a mixing bowl.
- With your hands, combine the two together, crushing some of the akadama pellets as you go.
- To moisten the mix, pour in water little by little. You don’t want the soil to get too wet at once or it will be difficult to work with. In total, this kokedama needed about ¾ to 1 cup to get the right consistency and shape a ball easily.
- If soil isn’t sticking together well at this point, sprinkle in a little more akadama soil. You’ll know you have the right mix when it holds together.
Once you’ve molded the ball, hold it in both hands and press one thumb into the top, like in photo above, to make a hole for your plant’s roots.
You Might Also Like:
DIY Potting Bench
Upcycled Pallet Planter
How To Force Bulbs Indoors
Easy Upcycled Containers
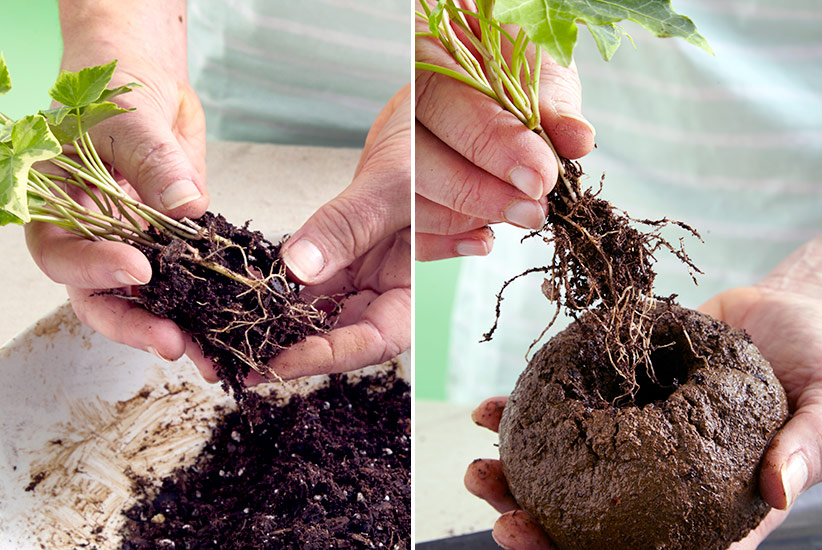
Step 2: Plant up your kokedama
- Set the ball aside to prepare your plant.
- Take it out of its pot and gently remove potting mix so the roots are mostly bare.
- Then just slip the roots into the hole and gently pack the ball around them.
- If your plant is too large for the ball you’ve prepared, you may be able to divide the plant now, depending on what you’ve chosen, and make more than one kokedama.
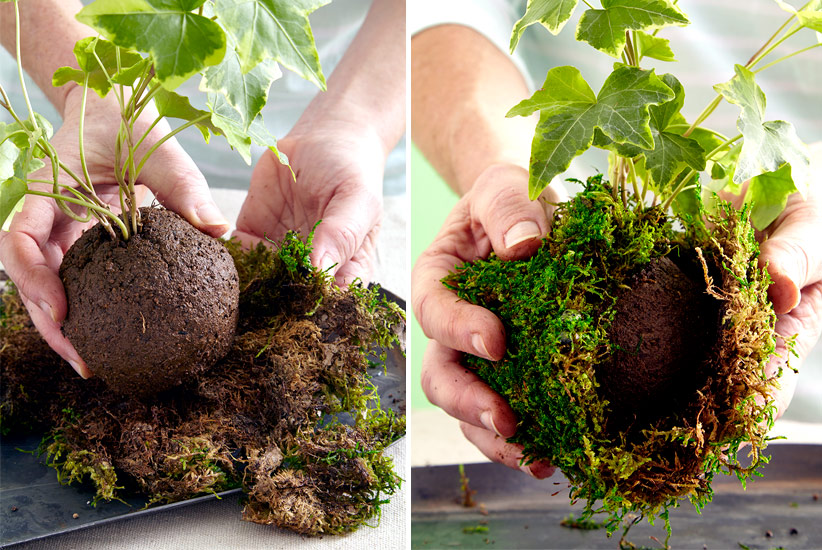
Step 3: Wrap with moss
Now you’re ready to wrap your ball in sphagnum sheet moss. You can dampen it by soaking the moss in warm water, if you’d like. But the sheet moss will absorb water just fine without pre-moistening it. The photo above shows how to lay out the sheet moss, set the ball in the center and gather the moss around the soil and up to the base of the plant.
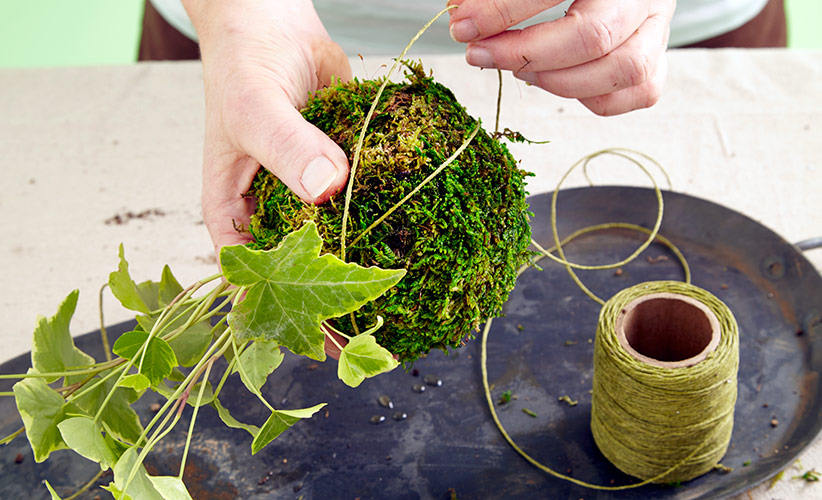
Secure with string
To secure the moss in place, hold the ball in one hand and wind the waxed string or floral wire around it in all directions. Start at the bottom of the ball and leave a piece of longer string exposed so you can tie it off when you’re done wrapping. If you’d like to hang your kokedama, begin at the top of the ball, by the base of the plant, and leave an extended section of string.
Caring for your Kokedama
- Fill a small bowl halfway with water and set your kokedama in for 5 to 10 minutes or until it’s heavy. Every few days, feel the ball’s weight to determine if it needs soaking again. The humidity and temperature inside your house or out in the garden will affect how often you need to water.
- Wait a few days before exposing plants that like full sun to sunny conditions. Hardening them off will ensure they don’t burn.
- During the growing season, feed kokedama once every few weeks by mixing water-soluble fertilizer in the water bowl.
- Place your kokedama on a shallow dish to help protect wood surfaces indoors.
- If well-watered plants start to show signs of stress, move them to a larger ball.
You Might Also Like:
Garden Design Ideas
Watch Our How-To Videos on YouTube
Woodworking Project Plans